Tuesday, January 21, 2014

Bisquick Chocolate Chip Cookies

These cookies are a great way to use up a box of bisquick that isn't going to make it to the end of the month.  These cookies are super tasty and actually remind me of my top secret recipe for chocolate chip cookies.  I found the recipe by way of pinterest, but I think it could stand to use a few changes, which I'm outlining in my blog post here.

If you're looking for a quick homemade cookie recipe, then these are your new go-to!

Bisquick Chocolate Chip Cookies
From Plain Chicken

1 stick of softened butter
1 cup of brown sugar
2 tsp vanilla
1 egg
2 1/4 cup bisquick mix
1 tsp of instant espresso
1 cup of chocolate chips

Heat oven to 375°F. In large bowl, mix butter, sugar, vanilla and egg. Stir in Bisquick mix, instant expresso and chocolate chips. 

Using a cookie dough scoop, scoop dough onto ungreased cookie sheet, about 2 inches apart. 

Bake 8-10 minutes or until golden brown. Remove from cookie sheet to cooling rack and allow to cool for a few moments before diving in.


Monday, January 13, 2014

Cornmeal Biscuits

This is another simple recipe that uses bisquick and cornmeal.  It's so easy that all you do is substitute half of the bisquick flour with cornmeal and follow directions!


Breakfast Stuffing

Here is a simple make ahead breakfast dish that uses cornmeal biscuits, breakfast sausage and peppers.  This is pretty self explanatory and I'll use the pictures to tell the story!
Spray a pan with Pam and arrange cubes of whatever bread you wish.  This was a combo of cornmeal biscuit and gluten free bread.


Top that with a pound of breakfast sausage seasoned as you wished and add a tablespoon of tomato paste and about 2 cooked and chopped peppers.


Cover with egg whites


Bake at 375 for about 20 minutes or until nothing jiggles. Enjoy!

Monday, December 2, 2013

Chicken Delight

After an extravagant week of eating out and eating a lot, it's time to detox.  I decided to turn to "You Are What You Eat" by Dr. Gillian McKeith for some detox inspiration.  A recipe that looked yummy and easy and accessible to try was her Chicken Delight Recipe.  This recipe was super easy to put together.  Cooking the chicken with a bit of liquid in the oven makes for a very moist chicken breast.

Chicken Delight
3 chicken breasts sprinkled with pepper
Handful of Basil Leaves
1 Tomato, chopped
1 tsp boullion
1/2 cup boiling water
Handfuls of Spinach

Preheat the oven to 400F

Lay a sheet of foil in a baking tray and place the chicken breasts on the foil.  Tear the basil leaves and add the basil and tomatoes over the chicken.  Pour the boullion and water mixture over the chicken and tomatoes.  Fold over the foil to make a packet and bake for 20 minutes or until the chicken is cooked through.

Serve over handfuls of spinach (raw or lightly steamed)


Squash and Sweet Potato Soup

Lunches during my week of detox is this light Fall soup from "You Are What You Eat" by Dr. Gillian McKeith.

This soup is quite easy, minus all of the chopping of the vegetables.  I adapted the recipe slightly because my store did not have some of the ingredients (fennel for example).  The soup is actually quite filling even though it's just veggies.  It's the perfect soup for fall and after a heavy Thanksgiving week!

Squash and Sweet Potato Soup
6 cups of water
2tbsp olive oil
1 tbsp chicken bouillon
1 butternut squash, cubed
1 sweet potato, cubed
3 large carrots, sliced
1 onion
1 clove of garlic

Heat the olive oil in a large pot and add all of the vegetables and cook until the veggies are soft (about 10-20 minutes)  Add the bouillon and 6 cups of water and bring to a boil.  Cook for about 20 minutes and either blend or leave the veggies whole.  I blended the chilled soup the next day.  Waiting until the next day is much safer than blending hot liquids!

Monday, November 18, 2013

Buns experiment- Gluten Free and Whole Wheat

So what happens when you take the perfect recipe for buns and then decide to change it using gluten free flour, whole wheat flour and then finally go back to the original?  The below photo is what happens!


For the gluten free version I took my favorite recipe and make a few changes

Ingredients
1 tablespoons active dry yeast
1/2 cup plus 2 tablespoons warm water (110° to 115°)
1/6 cup vegetable oil
1/8 cup sugar
1 egg
1/2 teaspoon salt
2 cups Gluten Free Flour
1 tbsp Flax Seed mixed into 3 tbsp boiling water

In a large bowl, dissolve yeast in warm water. Add oil and sugar; let stand for 5 
minutes.  Add the egg, salt, flax seed and enough flour to form a soft dough. 

Turn onto a floured surface; knead until smooth and elastic, about 3-5 minutes. Do not let rise. Divide into 4 pieces (about 5 oz each); shape each into a ball. Place 3 in. apart on greased baking sheets and flatten the ball so they look like discs

Cover and let rest for 30 minutes. Bake at 425° for 8-12 minutes or until golden brown. Remove from pans to wire racks to cool.

For the completely whole wheat version, I just used whole wheat flour and didn't have the flax seed.

In sum, be careful when baking.  In this case, halving the recipe, may not have been a smart idea.  Gluten Free flour is still hard to work with!  Stay tuned to see if I make gluten free buns again!

Wednesday, October 30, 2013

Pumpkin Ravioli

It's the week of Halloween and it was time to break into some canned pumpkin.  I saw a recipe a few weeks ago in Self Magazine for some pretty easy and delicious looking ravioli.  I said, "Great! This looks like a yummy and easy recipe to try!"  This is easy, so just go ahead and make this already!

I followed the Self Magazine recipe pretty well, but I ended up with more ravioli than they made.  I also did not make the butter sage sauce they had, but instead went with olive oil and parmesan cheese.  There are two ways you can cook the prepared ravioli.  The first way I've tried was to simmer them in hot water and then drizzle with olive oil and cheese.  The second way is to directly cook them in the oil in a pan.  Cooking them directly in olive oil, makes them crispy!  Both ways are equally delicious!

Pumpkin Ravioli
Self Magazine

1/2 cup canned pumpkin
1 lightly beaten egg yolk
2 tbsp grated parmesan
1 tbsp bread crumbs
Salt and Pepper
16 wonton wrappers
1 egg white lightly beaten

Combine all of the ingredients (minus the wonton wrappers) in a bowl.

Arrange the wonton wrappers on a sheet of parchment paper.  Place a rounded tsp of filling near the corner of the wonton wrappers. Brush edges with the egg white and fold over.

Cook!
Version 1: Cook the ravioli in simmering water for 4 minutes or until they start to float.  Place on a plate and drizzle with olive oil and cheese
Version 2: Heat olive oil in a non stick pan over medium heat and directly place the ravioli in the pan until they start to bubble.  Flip and cook on the other side.  Add cheese.  Eat

All lined up!
Close Up!
Folded and Made
Close Up
Cooked by simmering
Crispy!

Monday, October 28, 2013

Turkey Meatballs

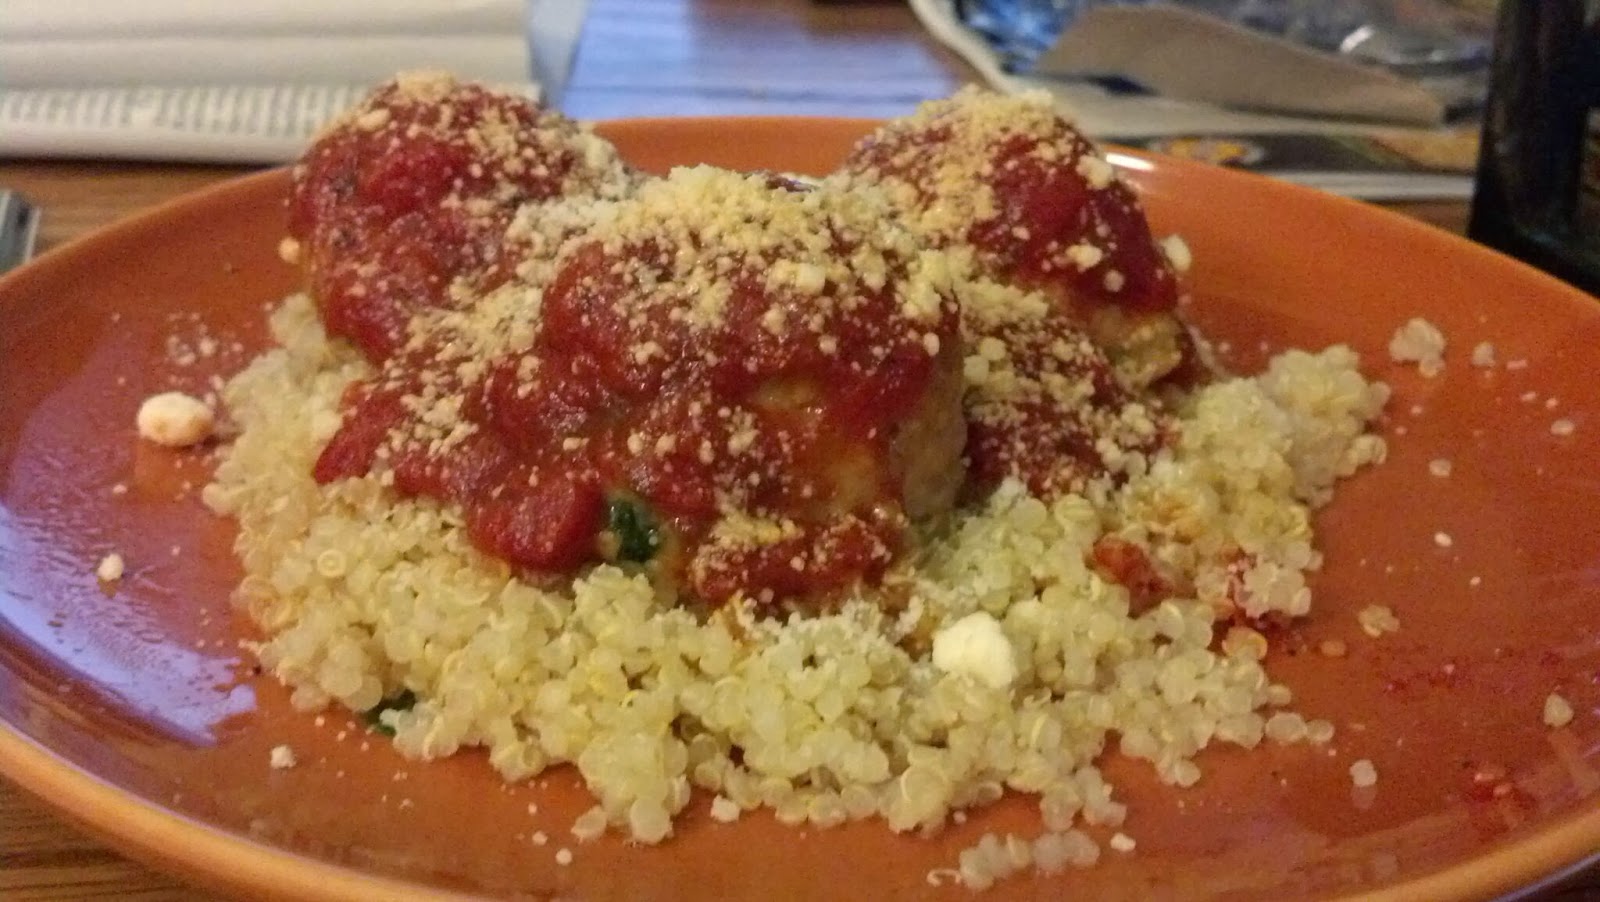
When you eat a lot of ground turkey, meatballs are likely going to be something you make with it.  This recipe for turkey meatballs features a power punch of veggies.  I wanted to include some more veggies, just to see what happened and you can't taste them! These are a healthy and tasty meatball. I served mine with quinoa most days, but tried with spaghetti squash one day.  Another tasty treat is to stuff a bell pepper with the quinoa and turkey! Yummy!

Turkey Meatballs
1.5 pounds of ground turkey
3 egg whites
1 tbsp tomato paste
1/2 cup oat bran
1/2 cup baby spinach, chopped fine
1/2 red bell pepper, diced
10 basil leaves, chopped fine
Red Pepper Flakes, Salt and Pepper

Preheat oven to 375F

Put all of the ingredients into a bowl and mix to combine.  Portion the meatballs using a cookie dough scoop or make them into a large tablespoon size.  Place on a baking sheet lined with parchment paper.

Bake the meatballs for about 30 minutes or until they reach 165F.  Serve anyway you want with a little cheese!
Turkey Meatballs in a roasted green pepper

Turkey Meatballs with Spaghetti Squash
Turkey Meatballs with Quinoa

Saturday, October 26, 2013

How to Open a Spaghetti Squash and Why "Spaghetti" is a Misnomer

A few weeks ago, I purchased a spaghetti squash from Trader Joe's.  I was excited to try this seemingly magical and innocent winter squash.  People of the internet have shared the wonders of this happy little squash and I wanted to be part of the action.  What people don't explain, is just how difficult of a shell this little guy has.  The happy pale yellow flesh of the squash has a mean secret and this guy is one tough cookie to break.  I tried to slice it and that was impossible so it sat on my counter for a few weeks.

I finally worked up the nerve to attempt to open the squash and get through to this magical spaghetti.  I threw it into a preheated 350 oven and let it soften for about 20 minutes.  After time spent in the oven, the squash was very easy to open.  I sliced in half very easily, scooped out the seeds and threw it back in the oven after increasing the temperature to 375.  I let it roast for another 20 minutes and decided that was long enough.

The internet promised that the squash could easily be scraped into thin "noodles".  The internet was true!  You can easily scrape out the flesh with a fork and it looks quite interesting.  It's not exactly like spaghetti, but it was pretty neat to see such delicate strands come from such a difficult gourd to open.

I decided to use the remaining turkey meatballs I had to have "spaghetti" and meatballs.  This was hugely disappointing.  My squash was crunchy and flavorless.  It was not the best introduction to this "fantastic" carb replacement.

I went back to the internet and discovered a hash brown casserole made with the squash.  I decided that this would be what would make the most sense for this squash and you know what, it was.  Going forward I'm calling spaghetti squash, "hash browns" squash.  As hash browns, the inherent crunchy texture of the squash works perfectly.  When you top the hash browns with sunny side up eggs, the yolk will become absorbed into the squash just has it would with potatoes.  This is the best comfort food breakfast without feeling like a complete fatty afterwards!

Spaghetti Squash "Hash Browns"

1 tbsp butter
One medium sized Spaghetti Squash, already roasted and prepared
1 tbsp your favorite All Purpose Seasoning.  I used Trader Joe's 21 Seasoning Salute.

Heat a nonstick pan over medium high heat and add the butter.  Once the butter is melted add the squash in an even layer and add the seasoning.  Allow this to cook until the bottom side is brown, about 5 or so minutes.  Flip over and allow the top side to cook for about 5 minutes.  Turn off the heat.  Serve with eggs or your favorite breakfast dishes.

Close Up of the Squash

Check out that Steam Action!


Friday, October 11, 2013

Clean Breakfast Burritos

A breakfast staple of mine has been breakfast burritos.  I've been using a recipe from bodybuilding.com and it's quite delicious.  This is very simple to put together and they're very tasty.  I've decided to use sweet potatoes instead of regular potatoes, because I think they taste better than regular potatoes.  I like to serve mine with a little fruit on the side, and a little yogurt mixed with salsa.  It's delicious!

Breakfast Burritos
Bodybuilding.com

1 1/2 sweet potato
1 onion
8 egg whites
salt and pepper
cayenne pepper
1 tbsp coconut oil
6 low carb tortillas

Microwave the sweet potato until soft.  I do mine for 3 minutes, stir and then another 3 minutes
cook the onion in the coconut oil until soft. then add the sweet potatoes.  Add salt, pepper, cayenne pepper and the egg whites.  Scramble together until the eggs are cooked.  Divide into tortillas and serve with yogurt and salsa if desired.


Breakfast!